# This file was generated by Tor; if you edit it, comments will not be preserved # The old torrc file was renamed to torrc.orig.1, and Tor will ignore it
samedi 21 juin 2025
Local ({fr}) tor setting torrc
dimanche 28 janvier 2024
Réparation des thermostats HAGER 25120
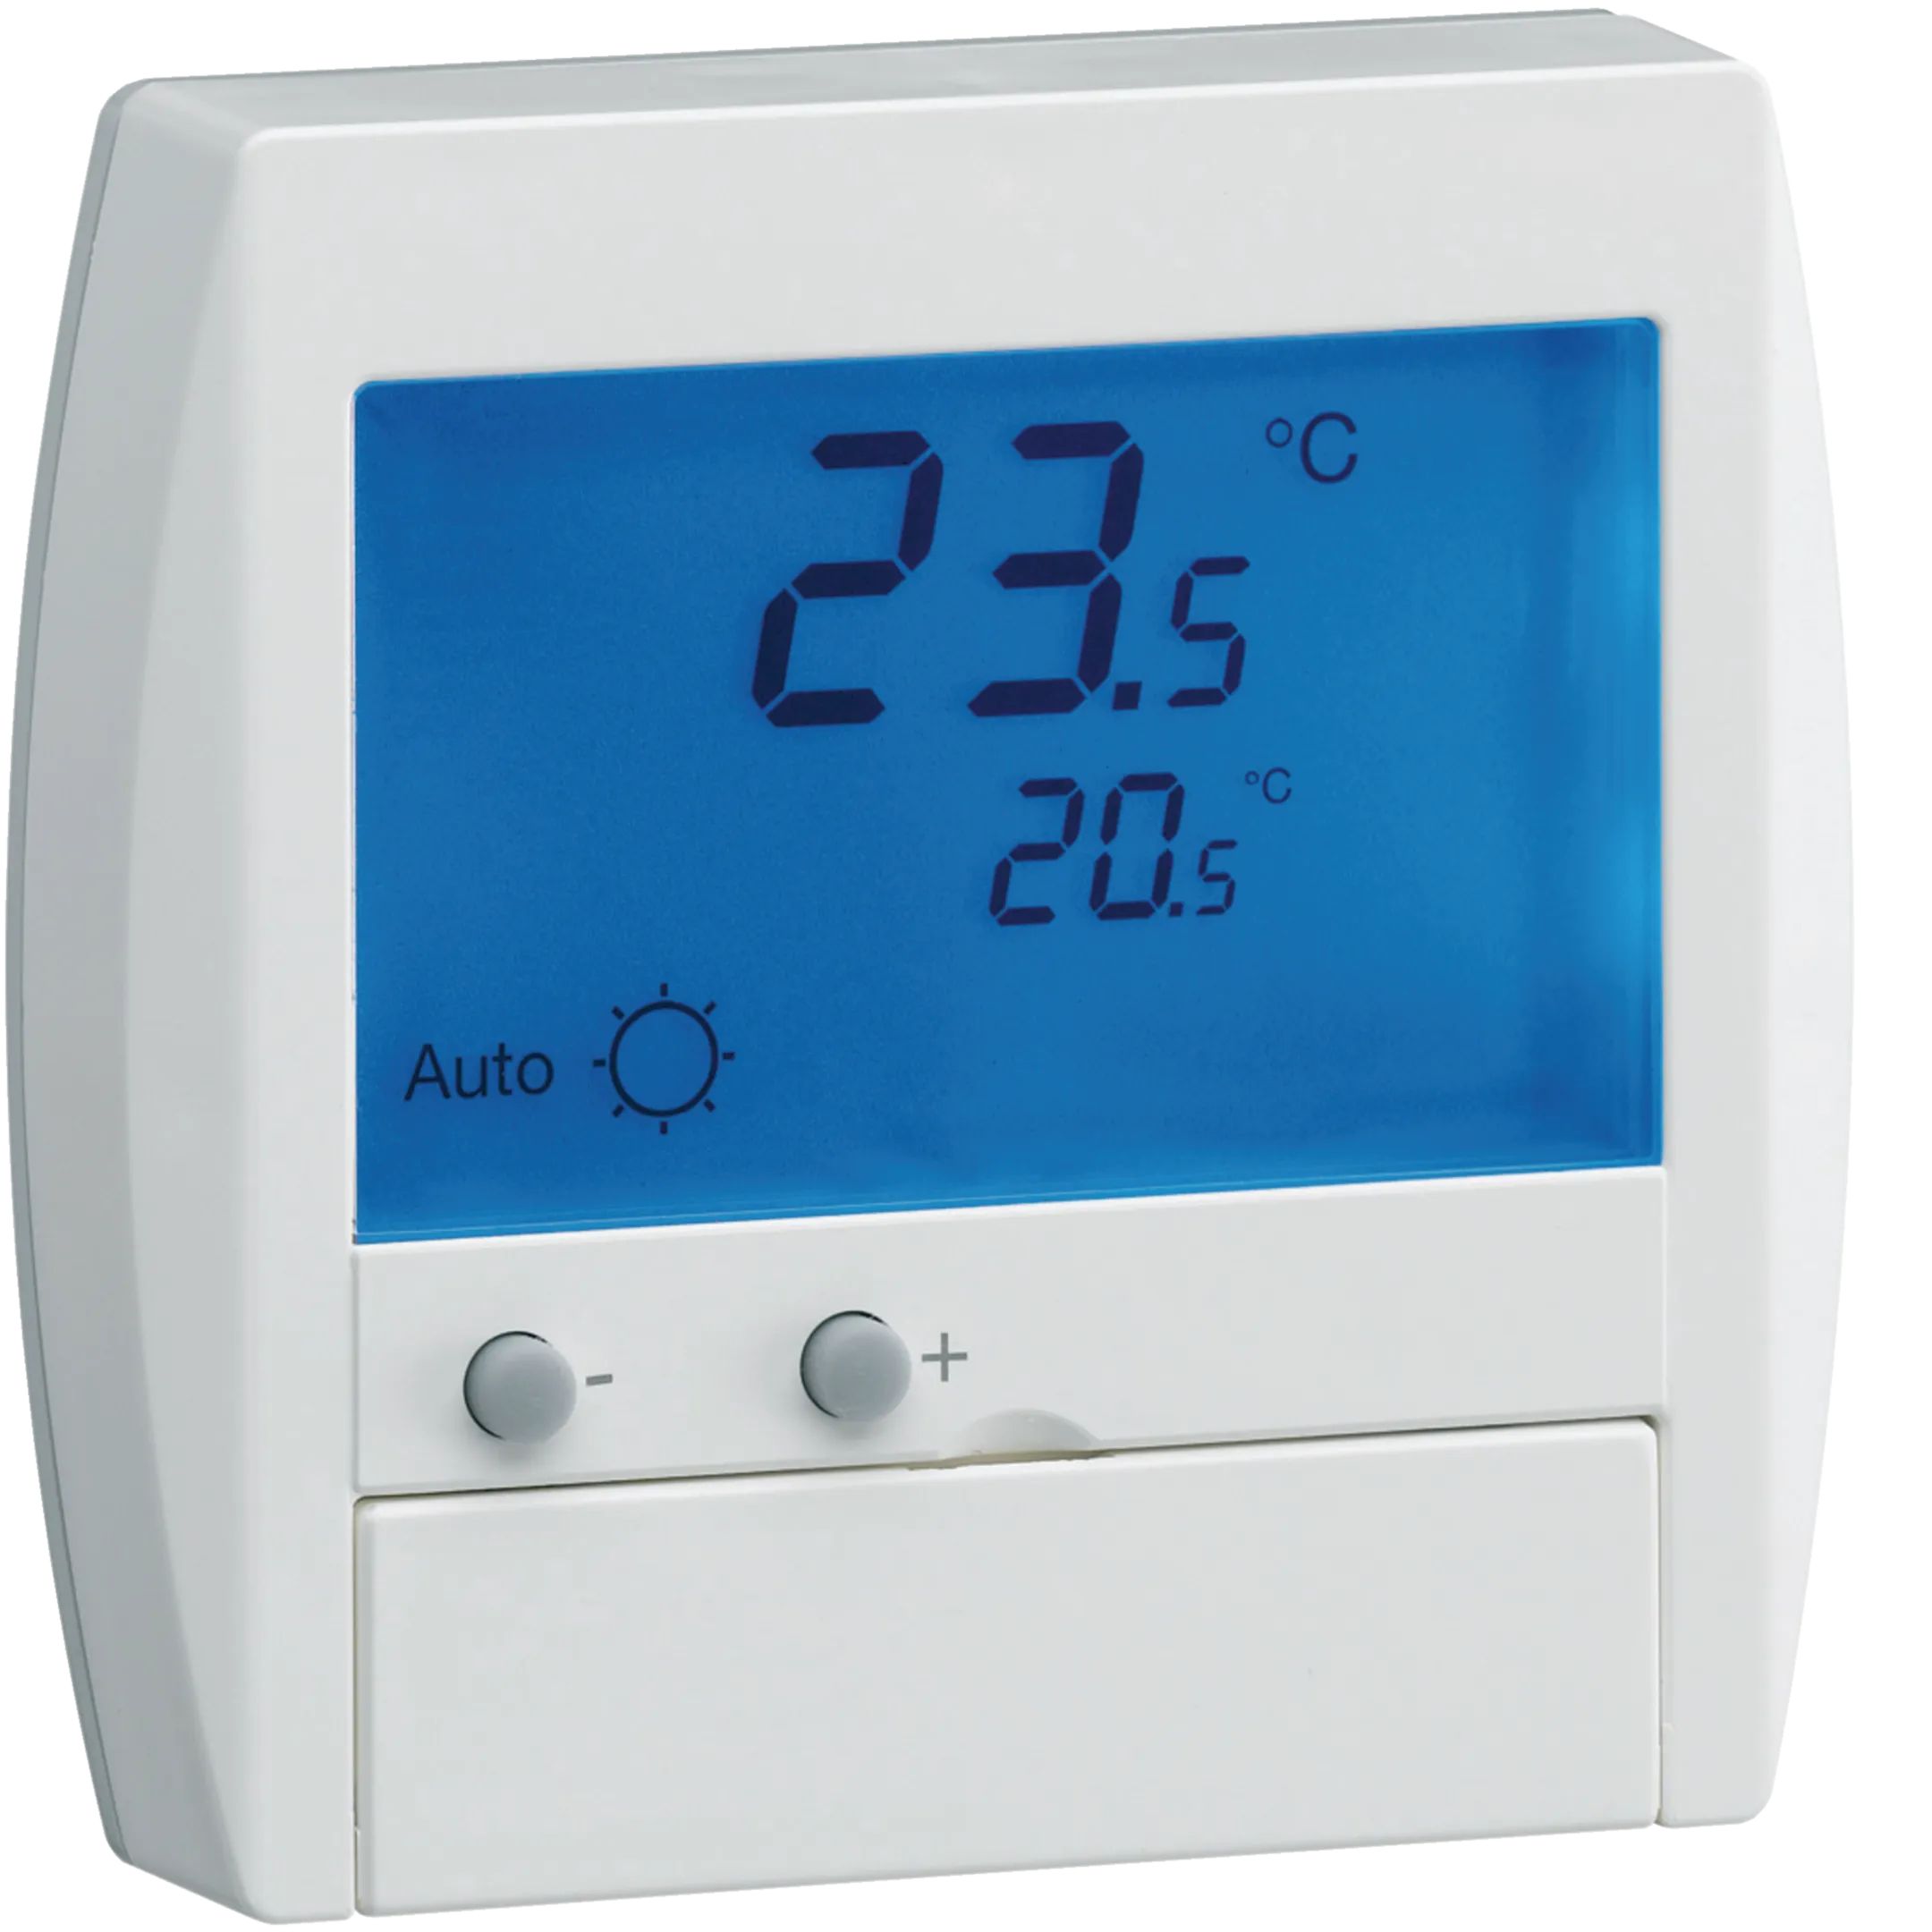
Le thermostat HAGER 25120
Ma maison est équipée de six de ces thermostats.

Ayant constaté plusieurs défauts de fonctionnement sur certain d'entre eux :
- Plus de rétro-éclairage
- Manque de contraste
- Reset du thermostat lors du changement de consigne ou autre manipulation
- Relais non commandé (pas de clic lors de l'allumage de l'icône "flamme")
- ...
Et comme le prix de ce thermostat va de 120 à plus de 150 € en boutique, j'ai décidé de creuser un peu.
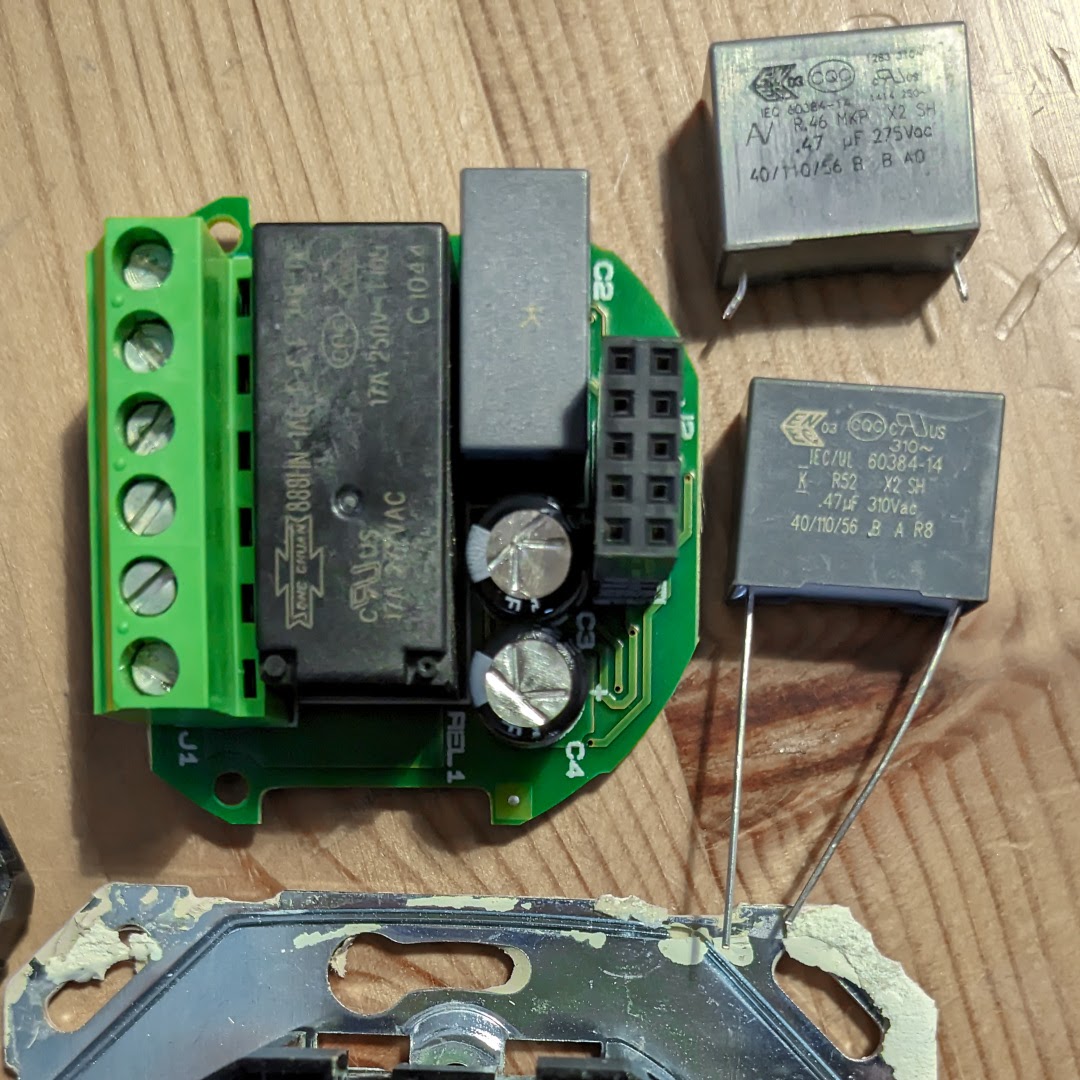
Après avoir démonté l'ensemble de mes thermostats et contrôlé la valeur du condensateur de 470 nF, tous avaient une capacité comprise entre 30 et 110 nF au lieu des 470 nF prévu (ce qui explique les défauts constatés).
Mais aucun n'était en court-circuit ou ne présentait une résistance inférieure au mégaohm. En effet, la classe du condensateur est X2, il est donc à isolement renforcé, certains disent "auto-cicatrisant" et ne peut, en principe, exploser lors de son vieillissement (diminution de sa résistance au courant continu jusqu'à la destruction).
Il est probable (je n'ai pas mesuré) que la commutation du relais alimentant la nappe du plancher ou du plafond chauffant provoque des surtensions (overshoot) due à l'induction propre de ces nappes. Ces surtensions pouvant dépasser largement des 275 Vac qui est la tension maximale de fonctionnement du condensateur d'alimentation équipant le thermostat, celui-ci voit sa capacité diminuer dans le temps.
Je suis presque sûr qu'on peut parler d'obsolescence programmée dans ce cas !
jeudi 21 décembre 2023
Orange Pi 5 + Serial port UART1
Place the file rockchip-rk3588-uart1-m1.dtbo in /boot/dtb/rockchip/overlay
~$sudo cp rockchip-rk3588-uart1-m1.dtbo /boot/dtb/rockchip/overlay
Edit armbianEnv.txt
~$sudo nano /boot/armbianEnv.txt
verbosity=1
bootlogo=false
overlay_prefix=rockchip-rk3588
overlays=uart1-m1
fdtfile=rockchip/rk3588s-orangepi-5.dtb
....
~$sudo reboot
~$ls /dev/ttyS*
/dev/ttyS1 /dev/ttyS9
You should see teleinfo stream
(Ctrl A k y to exit from screen)
You can also add a link in /dev/serial/by-id to allow some software like domoticz to "view" the port:
~sudo ln -s /dev/ttyS1 /dev/serial/by-id/ttyS1_GPIO
mardi 19 décembre 2023
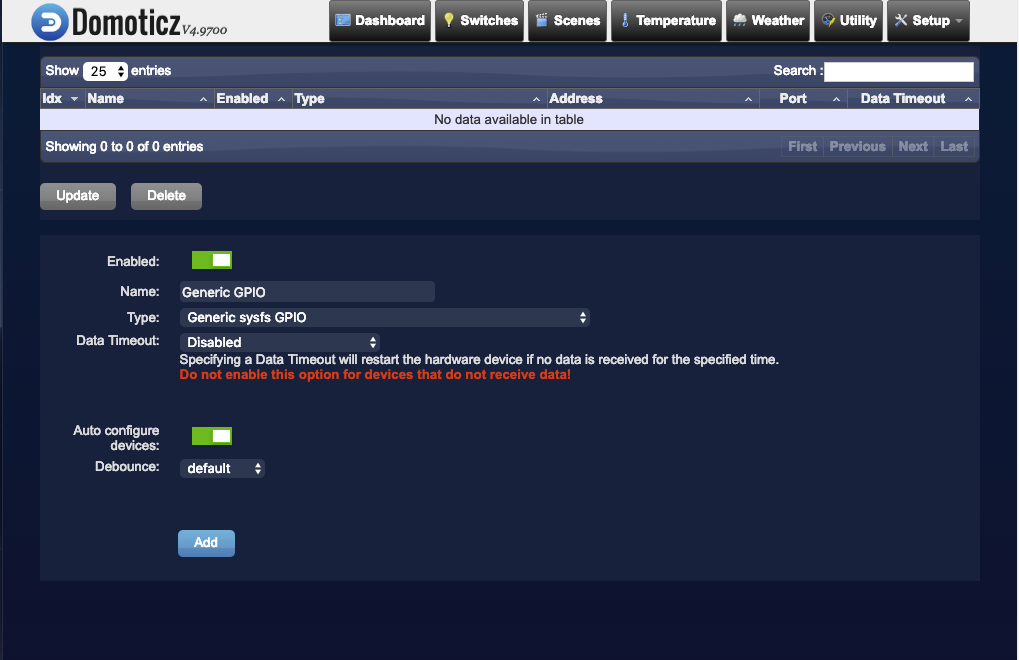
Orange Pi 5 + GPIO + Domoticz
I want to use GPIO's to manage relays with Domoticz and my Orange Pi 5:
Orange Pi 5 GPIO:
Below the outputs I want to manage:
Warning: wiringPi use wPi# but sysfs use GPIO#
That's the trick...
Go to domoticz home directory /home/domoticz or pi or dietpi etc.
- Create a script named sysfs.sh (or what ever) in domoticz directory
~$nano ~/domoticz/sysfs.sh
- Add this:
#! /bin/sh
#-----------------------------------------------------------------------------
# Init sysfs GPIO ports
#-----------------------------------------------------------------------------
#-----------------------------------------------------------------------------
# unexport if needed
#
#echo 6 > /sys/class/gpio/unexport
#echo 9 > /sys/class/gpio/unexport
#echo 10 > /sys/class/gpio/unexport
#echo 13 > /sys/class/gpio/unexport
#echo 15 > /sys/class/gpio/unexport
#echo 16 > /sys/class/gpio/unexport
#-----------------------------------------------------------------------------
# export
#
echo 29 > /sys/class/gpio/export
echo 59 > /sys/class/gpio/export
echo 58 > /sys/class/gpio/export
echo 35 > /sys/class/gpio/export
echo 52 > /sys/class/gpio/export
echo 92 > /sys/class/gpio/export
#-----------------------------------------------------------------------------
# Set direction = out
#
echo out > /sys/class/gpio/gpio29/direction
echo out > /sys/class/gpio/gpio59/direction
echo out > /sys/class/gpio/gpio58/direction
echo out > /sys/class/gpio/gpio35/direction
echo out > /sys/class/gpio/gpio52/direction
echo out > /sys/class/gpio/gpio92/direction
#-----------------------------------------------------------------------------
# Set active_low = 0 (false)
#
echo 0 > /sys/class/gpio/gpio29/active_low
echo 0 > /sys/class/gpio/gpio59/active_low
echo 0 > /sys/class/gpio/gpio58/active_low
echo 0 > /sys/class/gpio/gpio35/active_low
echo 0 > /sys/class/gpio/gpio52/active_low
echo 0 > /sys/class/gpio/gpio92/active_low
#-----------------------------------------------------------------------------
# Set edges = none if needed
#
# echo none > /sys/class/gpio/gpio4/edge
#-----------------------------------------------------------------------------
# Set pullups if needed
#
# raspi-gpio set 4 pu
# raspi-gpio set 11 dl
# raspi-gpio set 12 dl
#-----------------------------------------------------------------------------
lundi 27 novembre 2023
Orange PI 5 + Domoticz + rtl_433
Compile dev_domoticz from sources :
https://www.domoticz.com/wiki/Build_Domoticz_from_source
Install rtl_433 :
sudo apt-get install rtl-433
sudo rtl_433
Using systemd service:
sudo nano /etc/systemd/system/domoticz.service
[Unit]
Description=domoticz_service
After=network-online.target
[Service]
# User=dietpi
# Group=dietpi
# PermissionsStartOnly=true
WorkingDirectory=/home/pi5/dev-domoticz
PIDFILE=/var/run/domoticz/domoticz.pid
ExecStartPre=-/usr/bin/killall -q rtl_433
# ExecStartPre=/usr/bin/install -d -m 0700 -o pi5 -g PI5 /var/run/domoticz
ExecStartPre=setcap 'cap_net_bind_service=+ep' /home/pi5/dev-domoticz/domoticz
ExecStart=/home/pi5/dev-domoticz/domoticz -www 80 -sslwww 443 -pidfile /var/run/domoticz/domoticz.pid
Restart=on-failure
RestartSec=1m
#StandardOutput=null
[Install]
WantedBy=multi-user.target
sudo systemctl enable domoticz
sudo systemctl daemon-reload
sudo systemctl restart domoticz
sudo service domoticz status
● domoticz.service - domoticz_service
Loaded: loaded (/etc/systemd/system/domoticz.service; enabled; vendor preset: enabled)
Active: active (running) since Mon 2023-11-27 09:49:56 CET; 3h 26min ago
Process: 64410 ExecStartPre=/usr/bin/killall -q rtl_433 (code=exited, status=1/FAILURE)
Process: 64411 ExecStartPre=setcap cap_net_bind_service=+ep /home/pi5/dev-domoticz/domoticz (code=exited, status=0/SUC>
Main PID: 64412 (domoticz)
Tasks: 27 (limit: 4149)
Memory: 27.4M
CPU: 25min 18.524s
CGroup: /system.slice/domoticz.service
├─64412 /home/pi5/dev-domoticz/domoticz -www 80 -sslwww 443 -pidfile /var/run/domoticz/domoticz.pid
├─64440 sh -c "rtl_433 -F json -M newmodel -C si -M level 2>/dev/null"
└─64441 rtl_433 -F json -M newmodel -C si -M level
Orange PI 5 + GPIO
sudo apt-get update
sudo apt-get install -y git
git clone https://github.com/orangepi-xunlong/wiringOP.git
cd wiringOP
sudo ./build clean
sudo ./build
If you got something like :
Oops: Unable to determine board revision from /etc/orangepi-release or /etc/armbian-release.
-> Unable to open /etc/orangepi-release or /etc/armbian-release.
-> You'd best google the error to find out why.
vendredi 9 juin 2023
Orange Pi 5 - Transfert System and boot ... EASY
From this thread : https://forum.armbian.com/topic/27048-not-booting-to-system-on-nvme/
Thanx to robnielsen
Deleted partition on NVMe (if needed)
gdisk /dev/nvme0n1
d
1
d
Copied SD card to NVMD
cat /dev/mmcblk1 > /dev/nvme0n1Could take some time
Powered off the Orange Pi 5, removed the SD card and then powered it back on and it booted from the NVMe.
Then resized the filesystem
/usr/lib/armbian/armbian-resize-filesystem start
Now I have some thing like:
$ df -H
Filesystem Size Used Avail Use% Mounted on
udev 8.3G 0 8.3G 0% /dev
tmpfs 1.7G 10M 1.7G 1% /run
/dev/nvme0n1p2 254G 5.7G 245G 3% /
tmpfs 8.3G 0 8.3G 0% /dev/shm
tmpfs 5.3M 4.1k 5.3M 1% /run/lock
tmpfs 8.3G 0 8.3G 0% /tmp
/dev/nvme0n1p1 269M 158M 111M 59% /boot
/dev/zram1 51M 4.8M 43M 11% /var/log
tmpfs 1.7G 0 1.7G 0% /run/user/1000
$ mount | grep /dev/n
/dev/nvme0n1p2 on / type ext4 (rw,noatime,errors=remount-ro,commit=600)
/dev/nvme0n1p1 on /boot type vfat (rw,relatime,fmask=0022,dmask=0022,codepage=936,iocharset=utf8,shortname=mixed,errors=remount-ro)
/dev/nvme0n1p2 on /var/log.hdd type ext4 (rw,noatime,errors=remount-ro,commit=600)
lundi 22 mai 2023
OrangePi 3 LTS + USB DAC + MPD (from sources) + Resampling and Equalizer
I've buy this DAC :
HIFI CM6631A DAC Board USB Digital interface 32 / 24Bit 192k USB To I2S/SPDIF Coaxial Output Audio Decoder Analog Converter
mercredi 10 mai 2023
Howto delete file or folder with dot at the end of the name ...
Open command prompt and use rd :
rd /s "\\?\C:\Documents and Settings\User\Desktop\Annoying Folder..."
jeudi 13 avril 2023
433 Mhz switch command with GPIO with Raspberry Pi 3
Original thread :
Hardware :
Install g++ and Git :
Install and compile 433Utils :
git clone --recursive https://github.com/ninjablocks/433Utils.gitPut in it :
#include <stdio.h>
int main(int argc, char *argv[]) {
int PIN = 0; // cf. wiring Pi pinout
int codeSocketDon = 5510417;
int codeSocketDoff = 5510420;
if (wiringPiSetup() == -1) return 1;
RCSwitch mySwitch = RCSwitch();
mySwitch.enableTransmit(PIN);
if (atoi(argv[1]) == 1) { // you can set your own conditions here
mySwitch.send(codeSocketDon, 24);
} else {
mySwitch.send(codeSocketDoff, 24);
}
return 0;
}
Then compile :
g++ -DRPI ../rc-switch/RCSwitch.cpp control.cpp -o control -lwiringPiTurn ON :
Turn OFF :
sudo ./control 0samedi 29 octobre 2022
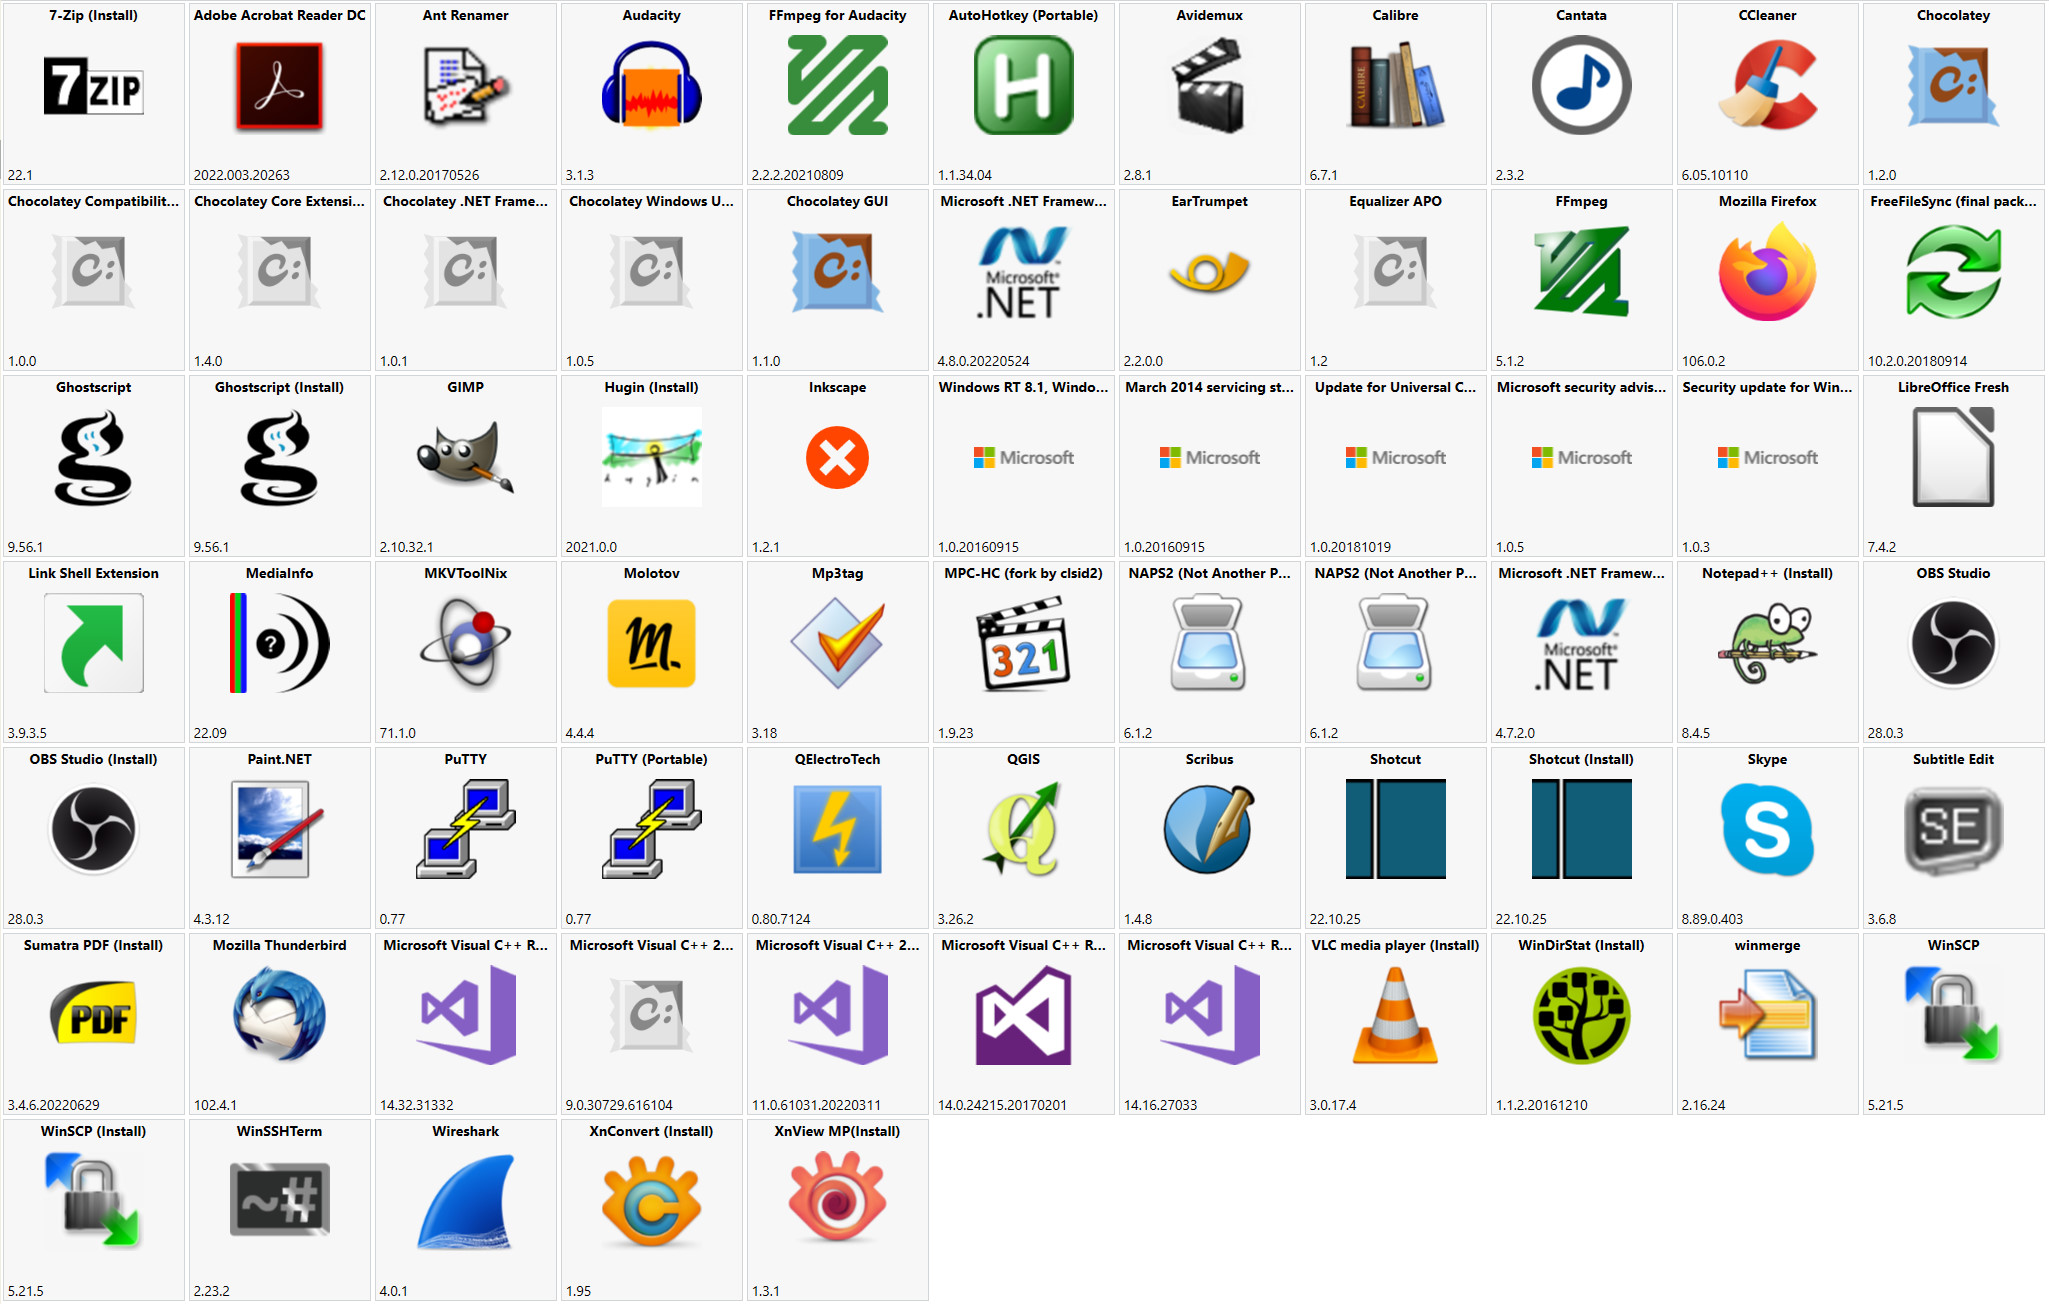
Liste des applications utiles disponibles sur chocolatey
- 7zip.install
- adobereader
- ant-renamer
- audacity
- audacity-ffmpeg
- autohotkey.portable
- avidemux
- calibre
- cantata
- chocolateygui
- dotnetfx
- eartrumpet
- equalizerapo
- ffmpeg
- Firefox
- freefilesync
- Ghostscript
- gimp
- hugin.install
- InkScape
- libreoffice-fresh
- LinkShellExtension
- mediainfo
- mkvtoolnix
- molotov
- mp3tag
- mpc-hc-clsid2
- naps2.install
- netfx-4.7.2
- notepadplusplus.install
- obs-studio.install
- paint.net
- putty
- qet
- qgis
- scribus
- shotcut.install
- skype
- subtitleedit
- sumatrapdf.install
- thunderbird
- vlc.install
- windirstat
- winmerge
- winscp.install
- winsshterm
- wireshark
- xnconvert.install
- xnviewmp.install
vendredi 21 octobre 2022
Windows explorer addins, plugins, extensions, cusomizations
XnShell
XnShell is a powerful Shell extension for Windows Explorer, allowing you to preview and perform various operations in the Windows ™ context menu.
https://www.xnview.com/fr/xnshell/
samedi 1 octobre 2022
Add GPS info in Windows explorer columns
Lauch a power shell console and paste this commands:
$HKLM_FolderTypes = 'HKLM:\Software\Microsoft\Windows\CurrentVersion\Explorer\FolderTypes'
$HKCU_FolderTypes = 'HKCU:\Software\Microsoft\Windows\CurrentVersion\Explorer\FolderTypes'
$PicFolderTypeTV = "$HKCU_FolderTypes\{b3690e58-e961-423b-b687-386ebfd83239}\TopViews\{00000000-0000-0000-0000-000000000000}"
Remove-Item $HKCU_FOlderTYpes -recurse
copy-item $HKLM_FolderTypes "$(split-path $HKCU_FolderTypes)" -Recurse
$TV = (gi (split-path $PicFoldertypeTV)).OpenSubkey($PicFoldertypeTV.split('\')[-1], $true)
$Find = '1System.DateCreated'
$Replace = '1System.GPS.Latitude;1System.GPS.Longitude;1System.GPS.Altitude;1System.DateCreated'
$ColumnList = ($TV.GetValue('ColumnList')).Replace($Find, $Replace)
$ColumnLIst
$TV.SetValue('ColumnList', $ColumnList)
$TV.Close()
get-process explorer | stop-process
Results:
mardi 19 avril 2022
Cleanup EXIF and / or rename images using EXIFTOOL
Rename images (RAW or JPEG) in a directory using EXIF tags
Or
Clean images of unwanted tags while keeping the most important ones
- Download, install exiftool
- Create a new registry file : RenameRAFJPEGusingEXIF.reg
- Edit this file:
[HKEY_CLASSES_ROOT\Directory\Shell\CleanupExif]
"Icon"="\"C:\\bin\\Images\\exiv2\\exiftool.ico\",0"
@="Cleanup EXIF meta from pictures recursively"
[HKEY_CLASSES_ROOT\Directory\Shell\CleanupExif\command]
@="\"C:\\bin\\Images\\exiv2\\exiftool.exe\" -All= -TagsFromFile @ -DateTimeOriginal -CreateDate -apertureValue -ExposureTime -LensModel -ColorSpace -icc_profile:all -iso -FocalLength -FocalLengthIn35mmFormat -ShutterSpeedValue -model -overwrite_original -L -r -ext jpg -ext jpeg \"%1\""
[HKEY_CLASSES_ROOT\Directory\Shell\RenameRafWithExif]
"Icon"="\"C:\\bin\\Images\\exiv2\\exiftool.ico\",0"
@="Rename RAW pictures recursively"
[HKEY_CLASSES_ROOT\Directory\Shell\RenameRafWithExif\command]
@="\"C:\\bin\\Images\\exiv2\\exiftool.exe\" -q -m \"-filename<${CreateDate;} ISO${ISO;} ${FocalLengthIn35mmFormat;} ${FocalLength;} f${FNumber;} Ts${ExposureTime;} ev${ExposureCompensation;} ${Model;}.%%e\" -ext RAF -ext ARW -ext RAW -ext RW2 -ext DNG \"%1\""
[HKEY_CLASSES_ROOT\Directory\Shell\RenameWithExif]
"Icon"="\"C:\\bin\\Images\\exiv2\\exiftool.ico\",0"
@="Rename JPEG pictures recursively"
[HKEY_CLASSES_ROOT\Directory\Shell\RenameWithExif\command]
@="\"C:\\bin\\Images\\exiv2\\exiftool.exe\" -q -m \"-filename<${CreateDate;} ISO${ISO;} ${FocalLengthIn35mmFormat;} ${FocalLength;} f${FNumber;} Ts${ExposureTime;} ev${ExposureCompensation;} ${Model;}.%%e\" -ext jpg -ext jpeg \"%1\""
dimanche 24 octobre 2021
Raspberry Pi to remote control a NAD C325 bee using Lirc
Install lirc :
pi@moode:~ $ sudo apt update
pi@moode:~ $ sudo apt install lirc
Find setting for NAD:
pi@moode:~ $ irdb-get find nadnad/451.lircd.conf
nad/AVR2.lircd.conf
nad/AVR2.lircd.conf
nad/CDP-5425.lircd.conf
nad/RC512.lircd.conf
nad/SR6.lircd.conf
nad/SR712.lircd.conf
Ok, i choose SR6 (NAD_SR712 seems working also):
pi@moode:~ $ irdb-get download nad/SR6.lircd.conf
Downloaded https://sourceforge.net/p/lirc-remotes/code/ci/master/tree/remotes/nad/SR6.lircd.conf as SR6.lircd.conf
and copy to etc folder:
pi@moode:~ $ sudo cp SR6.lircd.conf /etc/lirc/lircd.conf.d/
( or downloard lirc remote setting for NAD (325 use SR5 but SR6 seems working..) :
wget http://lirc.sourceforge.net/remotes/nad/SR6
)
Setup GPIO
GPIO 22 is used to transmit remote code by a simple NPN transistor and an IR LED:
Edit /boot/config.txt and add GPIO output line at the end :
pi@moode:~ $ sudo nano /boot/config.txt
driver = default
pi@moode:~ $ sudo cp /etc/lirc/lircd.conf.dist /etc/lirc/lircd.confReboot
pi@moode:~ $ sudo rebootTest by sending code to NAD
Send 100 times the code KEY_POWER:
Turn on the amplifier after booting with a service !
pi@moode:~ $ sudo nano /etc/systemd/system/amplifierOn.serviceMake this file executable:
pi@moode:~ $ sudo chmod 666 /etc/systemd/system/amplifierOn.service
Enable the service:
pi@moode:~ $ sudo systemctl enable /etc/systemd/system/amplifierOn.serviceJan 26 08:47:39 moode systemd[1]: Started Set up amplifier.
| Which indicates that everything is working normally... if not... good luck ! |
mardi 7 septembre 2021
G'MIC : un outil pour travailler le pixel
G'MIC est un logiciel de traitement et de génération d'images
Il existe sous la forme de plugin pour Gimp et Paint.net entre autres et sous la forme d'application pour Linux ou Windows avec interface ou en ligne de commandes.
La galerie d'exemples donnes un petit aperçu des capacité du programme
Exemple de ligne de commandes:
mercredi 2 juin 2021
Outils complémentaires pour la gestion du son sous Windows 10.
Equalizer APO 1.2.1
Ce logiciel vous permet d'appliquer des filtres tel que gain, passe-haut, bas, égaliseur graphique (dont les paramètres peuvent être importés et exportés au format texte) etc.. sur chaque sorties ou entrées et de manière indépendante.
Ces paramètres seront ainsi appliqués à tous les logiciels utilisés, votre lecteur audio (foobar2000 en ce qui me concerne) votre lecteur vidéo (pour moi: VLC) ou votre navigateur.
Vous pourrez aussi appliquer des filtres spécifiques pour votre casque et aussi sur son microphone ou votre webcam.
Vous obtiendrez ainsi le meilleurs son adapté à vos enceintes acoustique ou à votre casque gamer...
EarTrumpet
Cet utilitaire ajuste le volume de chaque logiciel indépendamment, fini les écarts de volume entre Skype, Firefox ou vos jeux.
Après l'installation, dans les paramètres activé l’icône EarTrumpet
Le menu ci-dessous est accessible depuis l'icône situé dans la zone de notification:
NirCmd
Raccourcie pour les haut-parleurs:
Puis un autre raccourcie pour le casque :
Pour obtenir le nom de chaque périphérique de sortie:
dimanche 20 décembre 2020
Build mpd (Music Player Daemon) on a Raspberry Pi
apt install meson g++ libpcre3-dev libmad0-dev libmpg123-dev libid3tag0-dev libflac-dev libvorbis-dev libopus-dev libogg-dev libadplug-dev libaudiofile-dev libsndfile1-dev libfaad-dev libfluidsynth-dev libgme-dev libmikmod-dev libmodplug-dev libmpcdec-dev libwavpack-dev libwildmidi-dev libsidplay2-dev libsidutils-dev libresid-builder-dev libavcodec-dev libavformat-dev libmp3lame-dev libtwolame-dev libshine-dev libsamplerate0-dev libsoxr-dev libbz2-dev libcdio-paranoia-dev libiso9660-dev libmms-dev libzzip-dev libcurl4-gnutls-dev libyajl-dev libexpat-dev libasound2-dev libao-dev libjack-jackd2-dev libopenal-dev libpulse-dev libshout3-dev libsndio-dev libmpdclient-dev libnfs-dev libupnp-dev libavahi-client-dev libsqlite3-dev libsystemd-dev libgtest-dev libboost-dev libicu-dev libchromaprint-dev libgcrypt20-dev
git pull --rebase git://github.com/MusicPlayerDaemon/MPD mastercd MPD
git pull --rebase git://github.com/MusicPlayerDaemon/MPD master
meson . output/release --buildtype=debugoptimized -Db_ndebug=true
meson configure output/release
ninja -C output/release
sudo ninja -C output/release install
mercredi 16 décembre 2020
Un peu de ffmpeg
Créer une vidéo avec une liste d'images/photos :
Sous Linux:
Sous Windows:
Créer l'image du spectre audio d'un fichier audio ou vidéo:
Encodage NVIDIA:
ffmpeg -i "e:\input.ts" -vcodec h264_nvenc -preset slow -level 4.1 -qmin 18 -qmax 22 "e:\output.mp4"Ou bien :
ffmpeg -loglevel debug -threads 4 -hwaccel cuvid -c:v mpeg2_cuvid -i "e:\input.ts" \
-filter:v scale_npp=w=1920:h=1080:format=yuv420p:interp_algo=lanczos \
-c:v h264_nvenc -preset:v llhq -profile:v main -level:v 4.1 -rc:v ll_2pass_quality -rc-lookahead:v 32 -temporal-aq:v 1 -weighted_pred:v 1 -coder:v cabac \
-f mp4 "e:\output.mp4" lundi 7 décembre 2020
Windows 10 : Utilisation simultané d'une connexion Ethernet pour le LAN et d'une connexion 4G ou autre pour le WAN
Suite à une panne de box, j'ai eu recours à mon téléphone portable pour utiliser Internet.
J'ai autorisé le partage par USB sur mon téléphone, connecté celui-ci au PC, mais ça ne fonctionné pas car ma connexion Ethernet été toujours active, si je désactivais cette connexion Ethernet, l'accès à Internet était possible mais alors plus d'accès au réseau local (NAS, etc... )
La solution trouvé ici (et ailleurs) : connexion simultanée wifi et ethernet win10 (pcastuces.com)
Panneau de config -> Centre Réseau et partage -> sur la gauche Modifier les param de carte
- Clic droit sur la carte a faire passer en priorité haute (Ethernet) -> Propriétés
- Sélectionnez Protocole Internet version 4 -> propriétés
- Bouton « Avancé… » tout en bas
- Décochez ensuite Métrique automatique et entrez une métrique de l’interface a 1
- Répétez ces étapes pour l'interfaces 4G (ou freewifi) mettant 2 en métrique sachant que plus la métrique est haute moins la carte est prioritaire
Par exemple: Connexion 4G en "10" et connexion Ethernet en "20"
Maintenant il est possible accéder au deux réseaux !