I want to use GPIO's to manage relays with Domoticz and my Orange Pi 5:
Orange Pi 5 GPIO:
Below the outputs I want to manage:
Warning: wiringPi use wPi# but sysfs use GPIO#
That's the trick...
Go to domoticz home directory /home/domoticz or pi or dietpi etc.
- Create a script named sysfs.sh (or what ever) in domoticz directory
~$nano ~/domoticz/sysfs.sh
- Add this:
#! /bin/sh
#-----------------------------------------------------------------------------
# Init sysfs GPIO ports
#-----------------------------------------------------------------------------
#-----------------------------------------------------------------------------
# unexport if needed
#
#echo 6 > /sys/class/gpio/unexport
#echo 9 > /sys/class/gpio/unexport
#echo 10 > /sys/class/gpio/unexport
#echo 13 > /sys/class/gpio/unexport
#echo 15 > /sys/class/gpio/unexport
#echo 16 > /sys/class/gpio/unexport
#-----------------------------------------------------------------------------
# export
#
echo 29 > /sys/class/gpio/export
echo 59 > /sys/class/gpio/export
echo 58 > /sys/class/gpio/export
echo 35 > /sys/class/gpio/export
echo 52 > /sys/class/gpio/export
echo 92 > /sys/class/gpio/export
#-----------------------------------------------------------------------------
# Set direction = out
#
echo out > /sys/class/gpio/gpio29/direction
echo out > /sys/class/gpio/gpio59/direction
echo out > /sys/class/gpio/gpio58/direction
echo out > /sys/class/gpio/gpio35/direction
echo out > /sys/class/gpio/gpio52/direction
echo out > /sys/class/gpio/gpio92/direction
#-----------------------------------------------------------------------------
# Set active_low = 0 (false)
#
echo 0 > /sys/class/gpio/gpio29/active_low
echo 0 > /sys/class/gpio/gpio59/active_low
echo 0 > /sys/class/gpio/gpio58/active_low
echo 0 > /sys/class/gpio/gpio35/active_low
echo 0 > /sys/class/gpio/gpio52/active_low
echo 0 > /sys/class/gpio/gpio92/active_low
#-----------------------------------------------------------------------------
# Set edges = none if needed
#
# echo none > /sys/class/gpio/gpio4/edge
#-----------------------------------------------------------------------------
# Set pullups if needed
#
# raspi-gpio set 4 pu
# raspi-gpio set 11 dl
# raspi-gpio set 12 dl
#-----------------------------------------------------------------------------
- Save
- Make the file executable
chmod +x ~/domoticz/sysfs.sh
- Two options (many in fact)
1- Execute this script in the rc.local file:
~$sudo nano /etc/rc.local
- Add at the end of the script and before exit 0 this line
/home/domoticz/sysfs.sh
exit 0
2- Modify /etc/systemd/system/domoticz.service (better):
- Add the line : ExecStartPre=/home/domoticz/sysfs.sh before starting Domoticz
~$sudo nano /etc/systemd/system/domoticz.service
[Unit]
Description=domoticz_service
After=network-online.target
[Service]
# User=dietpi
# Group=dietpi
# PermissionsStartOnly=true
WorkingDirectory=/home/pi5/dev-domoticz
PIDFILE=/var/run/domoticz/domoticz.pid
#Kill rtl_433 (domoticz cant start if it's already started)
ExecStartPre=-/usr/bin/killall -q rtl_433
# ExecStartPre=/usr/bin/install -d -m 0700 -o pi5 -g PI5 /var/run/domoticz
ExecStartPre=setcap 'cap_net_bind_service=+ep' /home/pi5/dev-domoticz/domoticz
#GPIO
ExecStartPre=/home/domoticz/sysfs.sh
#Start domoticz
ExecStart=/home/pi5/dev-domoticz/domoticz -www 80 -sslwww 0 -pidfile /var/run/domoticz/domoticz.pid
Restart=on-failure
RestartSec=1m
#StandardOutput=null
[Install]
WantedBy=multi-user.target
- Reboot
- Verify GPIO exports
~$sudo gpio exports
You should receive something like that:
GPIO Pins exported:
0(29): out 1 none
0(35): out 1 none
0(52): out 1 none
0(58): out 1 none
0(59): out 1 none
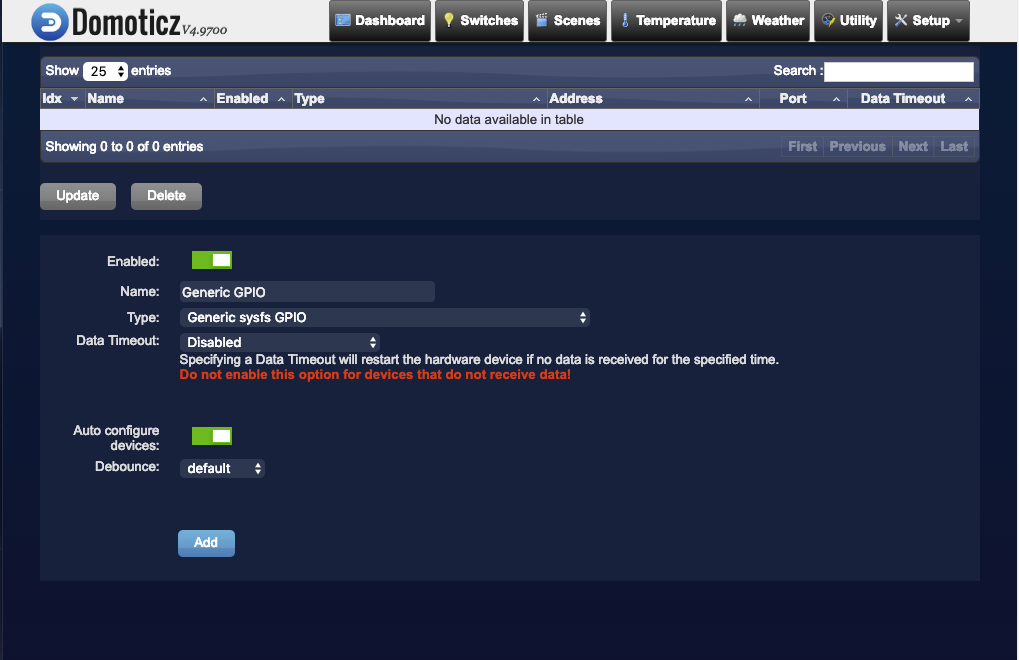
In Domoticz ->
Setup ->
Hardware ->
Add New hardware of the type ‘Generic sysfs GPIO’.
Then add new devices from unused in "Generic GPIO" (the name you give to your new hardware)
Don't forget to add those devices to your user !